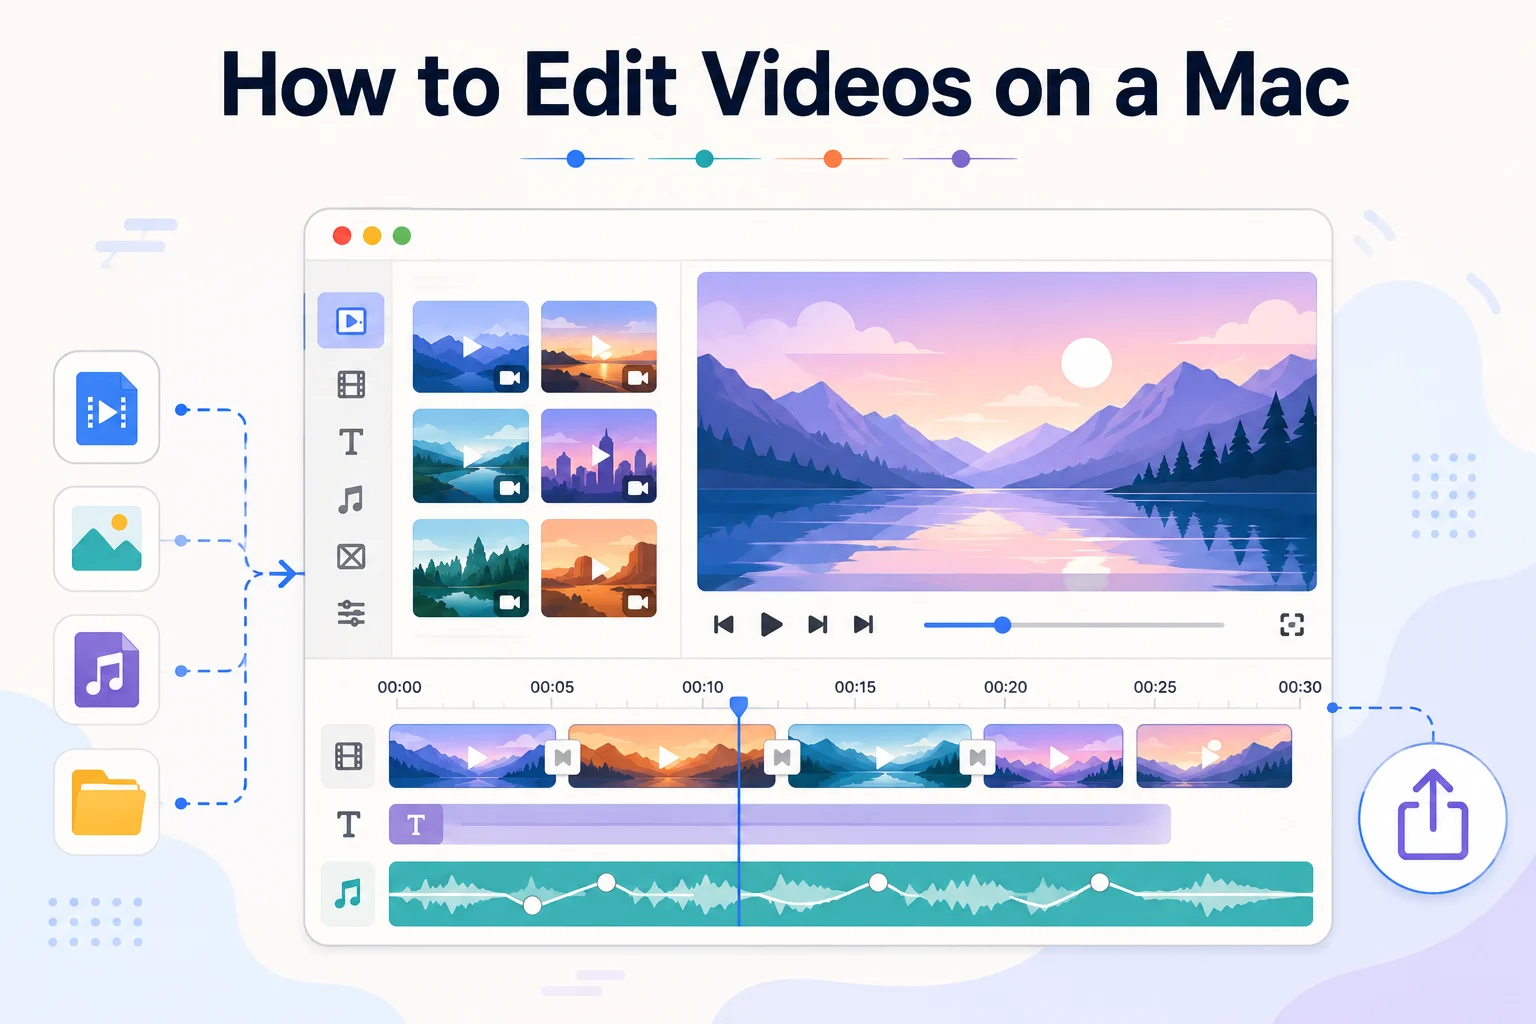
A MacBook handles video well enough that most people never need a second machine. What stalls beginners is rarely the hardware. It is the order of operations, because a project that starts messy often stays messy through every stage.
This guide covers one complete edit, from the first folder to the finished file. Wondershare Filmora runs natively on Apple Silicon and supports metal acceleration. For beginners comparing video editor Mac options, Filmora provides a straightforward workflow for completing the steps covered below.
Step 1. Organize Your Video Files Before Editing
Editing moves faster when every file has a clear place. Before importing clips into your MacBook movie editor, create one main project folder and keep everything there instead of spreading files across the desktop and Downloads.
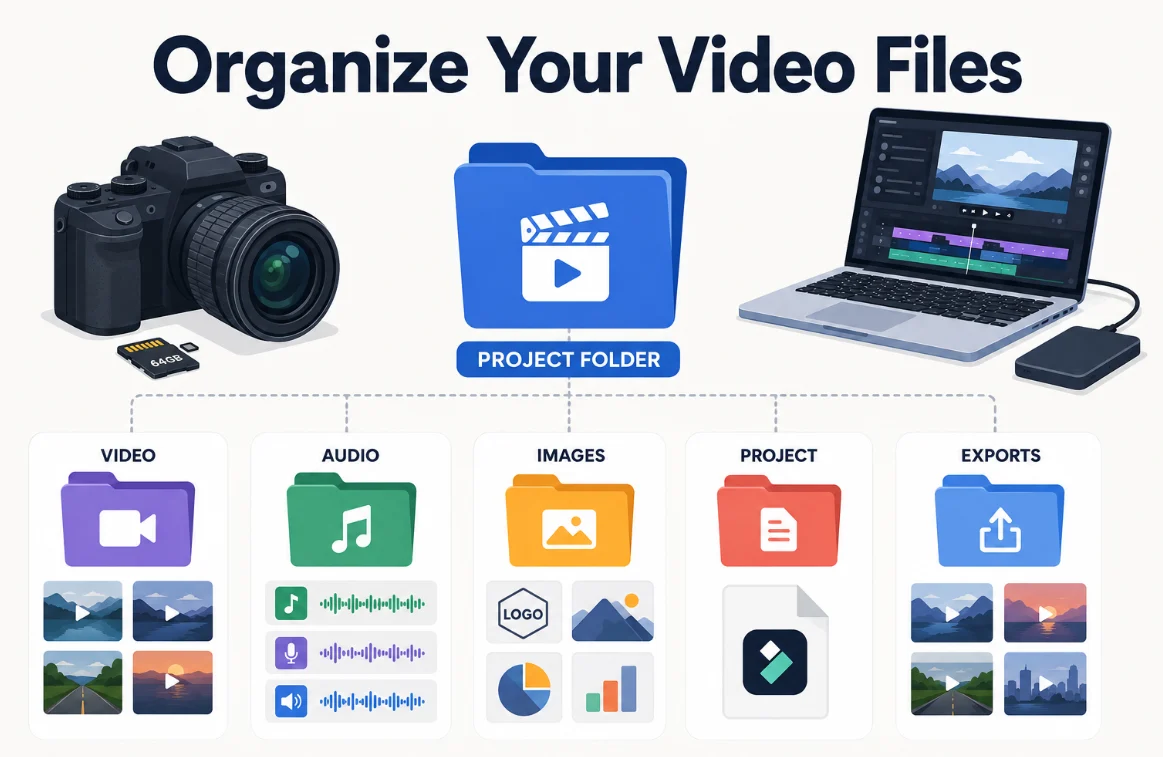
- Video: Keep camera clips and screen recordings under their original file names.
- Audio: Store music, voiceovers, and sound effects you plan to use.
- Images: Keep logos, photos, and graphics that will appear in the video.
- Project: Save the Filmora project file separately from your source media.
- Exports: Keep finished videos here so final versions do not get mixed with drafts.
Filmora follows a similar structure inside the app. “Project Media” keeps files for your current edit, while “Global Media” stores assets you may reuse across projects. The Filmora video editor for Windows follows a similar workflow if you also edit on a PC.
Step 2. Create a New Project in Filmora
With the files sorted, open Filmora and choose the shape of the video before editing. The startup window includes an aspect ratio menu, while “Create Project” takes you into the editor. The table compares 3 common ratios by frame size and typical use:
| Consideration | 16:9 Landscape | 9:16 Vertical | 1:1 Square |
| Frame size at 1080p | 1920 x 1080 | 1080 x 1920 | 1080 x 1080 |
| Fills the screen on | YouTube, laptops, televisions | Reels, Shorts, TikTok | Some social feeds, not full-screen displays |
| Room for on-screen text | Wide bands top and bottom | Tall margins at the sides | Even space on all four edges |
| Cost of reframing later | Crops to vertical badly | Crops to widescreen badly | Crops both ways with least loss |
Landscape works well for most long-form videos viewed on conventional screens. Vertical is designed for phone-first platforms such as Reels, Shorts, and TikTok. Square provides a balanced frame for social posts but does not fill standard landscape or vertical screens.
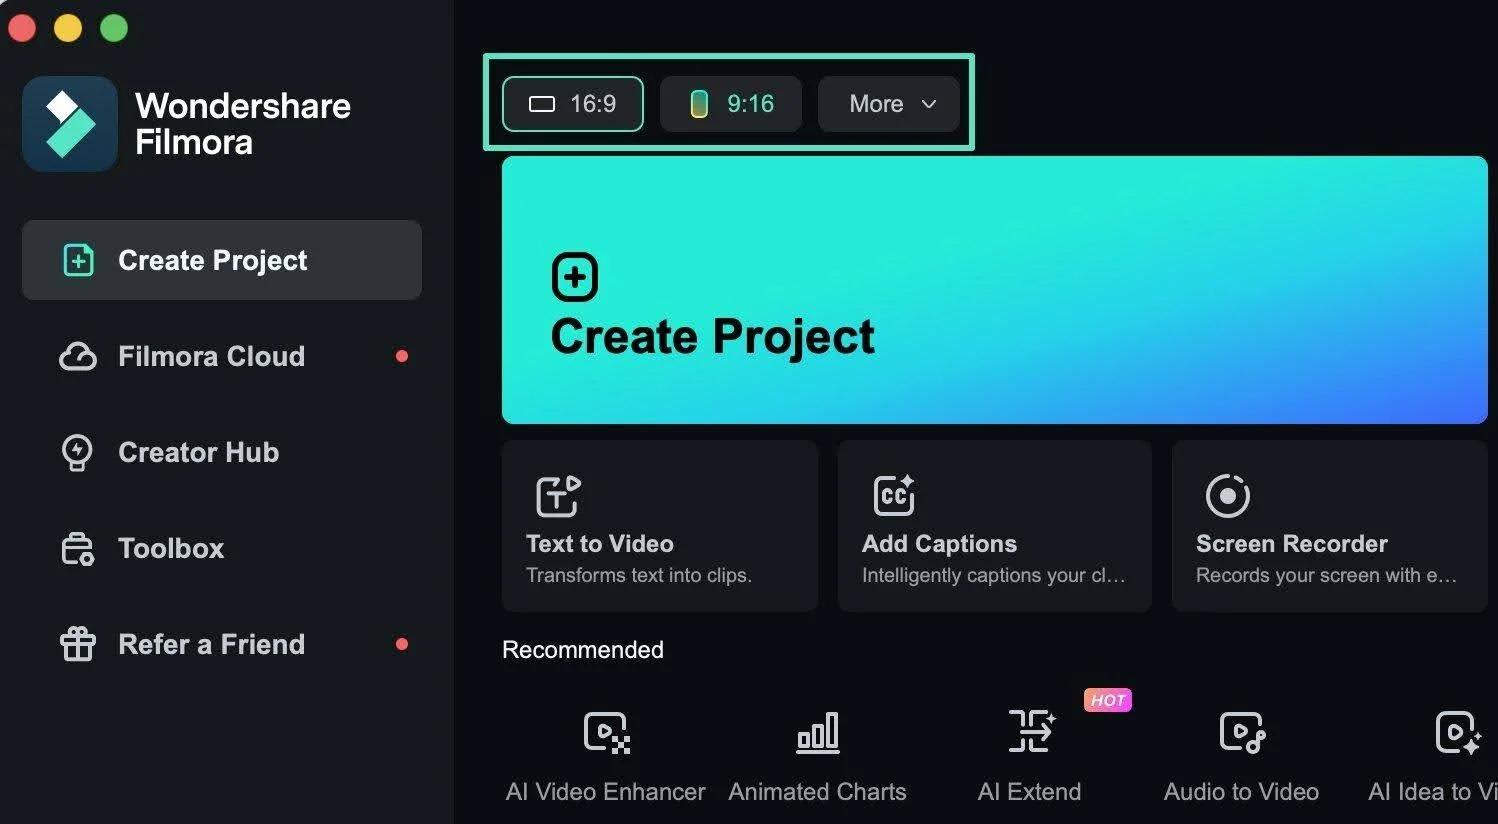
Filmora is one of several video editor Mac options, but it keeps the initial aspect-ratio choice accessible when creating a project. You can also adjust project settings later if the resolution, frame rate, or aspect ratio needs to change.
Step 3. Import and Arrange Your Media
A new project opens empty, so the footage needs to come in next. Filmora offers several routes into the media library, and each one brings your files into the same movie editing software for Mac workspace.
Three Ways to Bring Files In
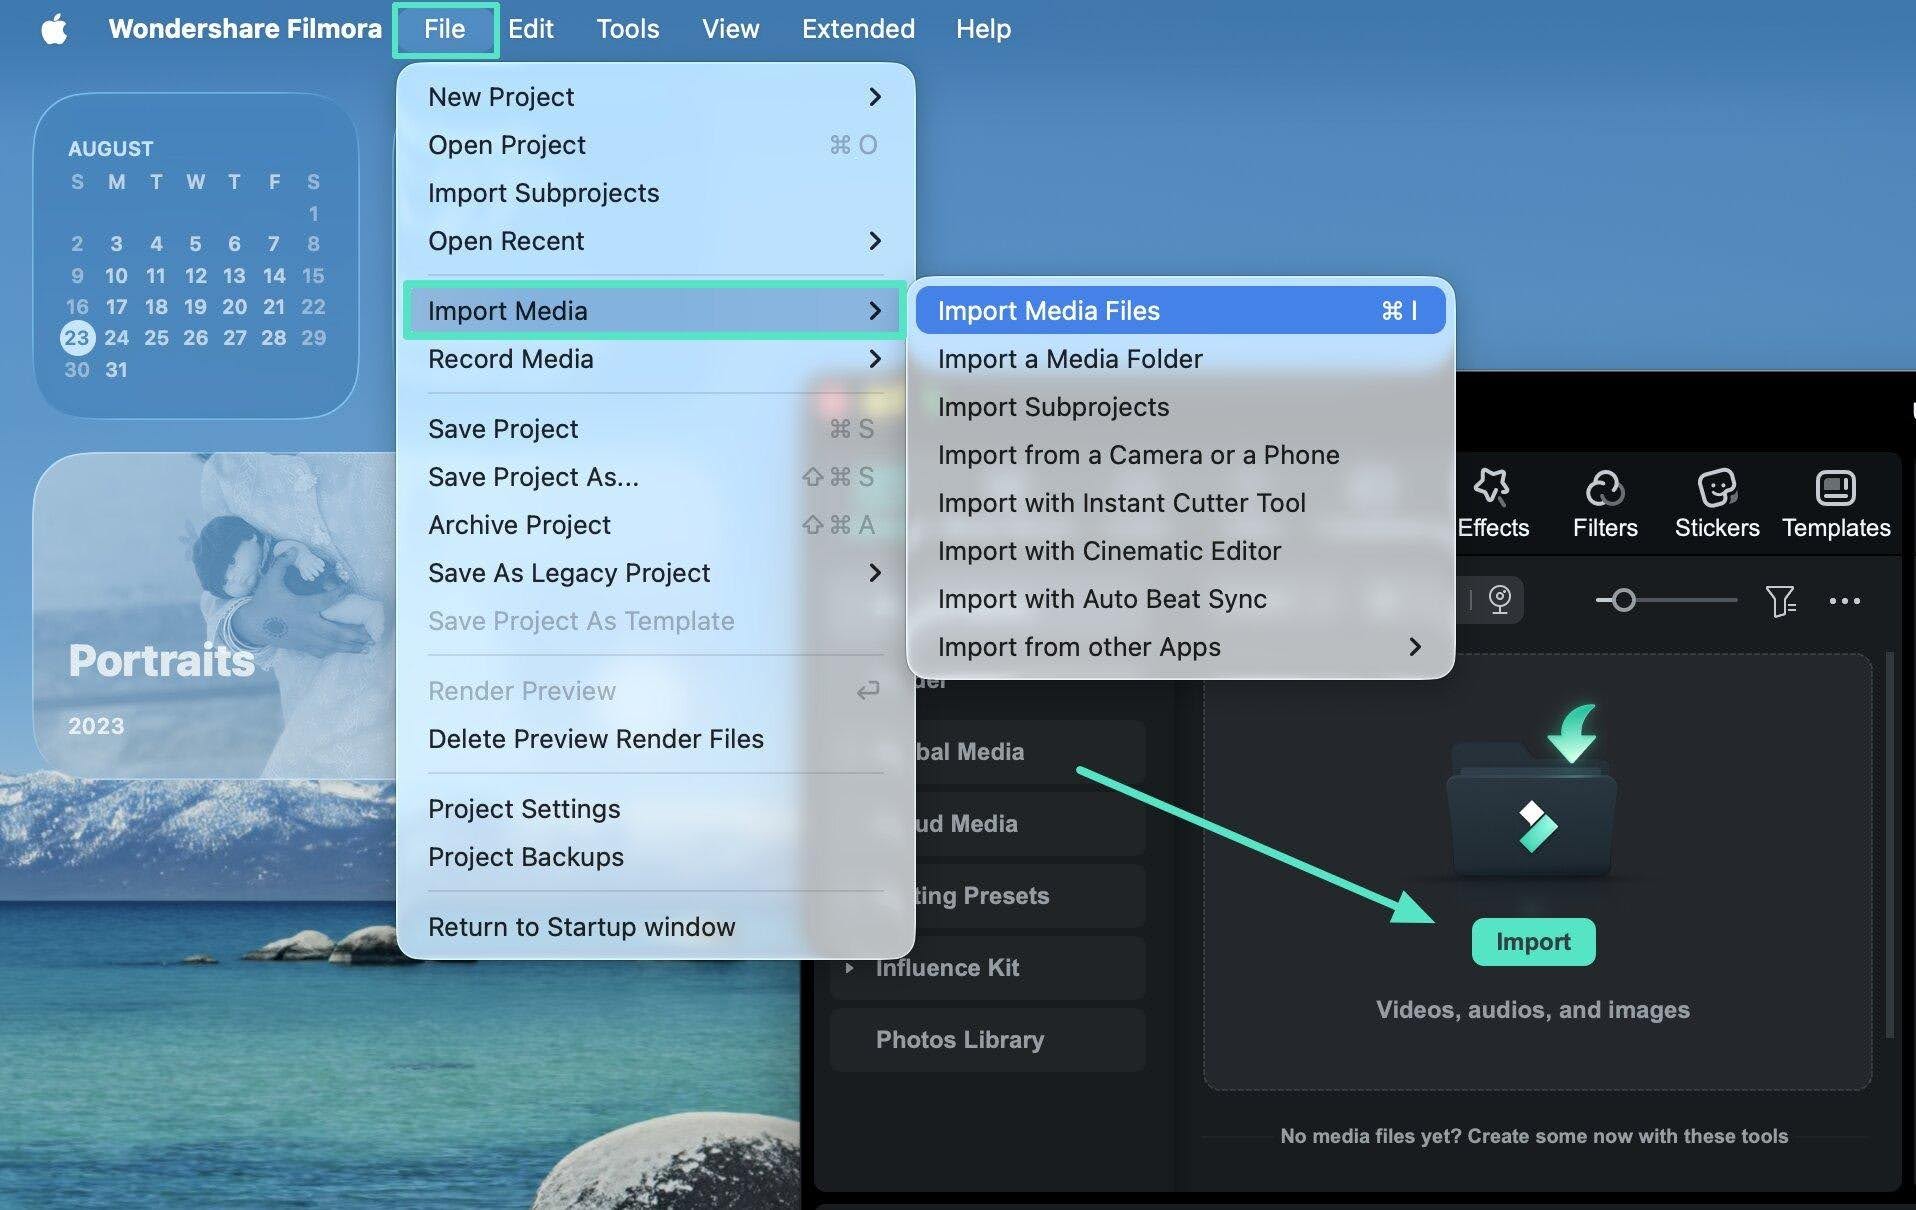
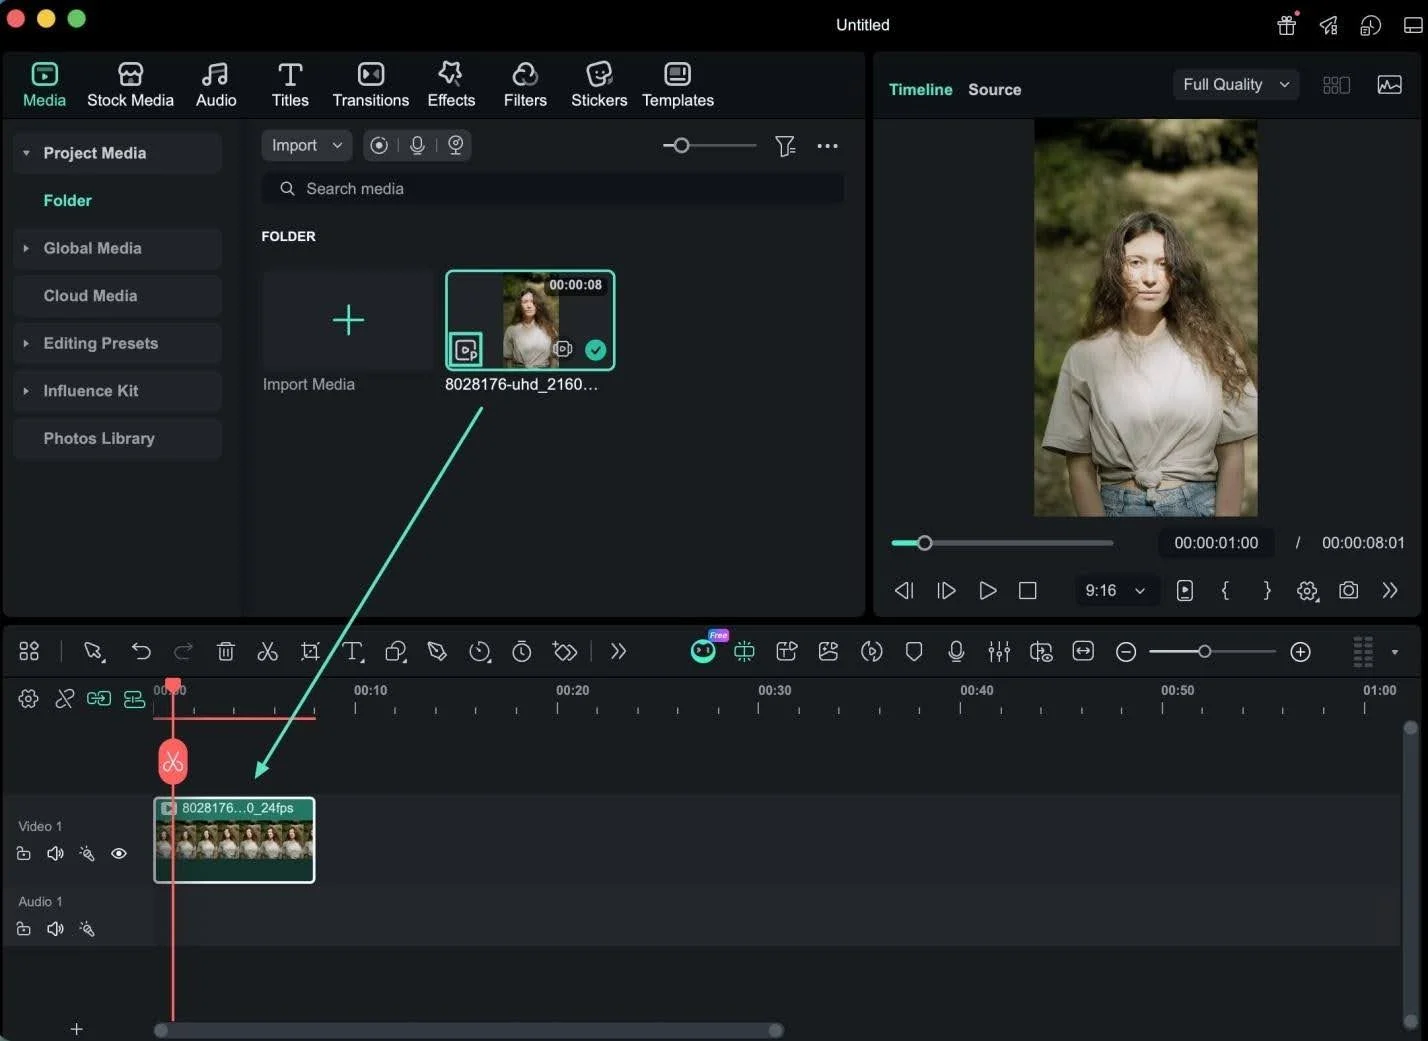
The “File” menu includes “Import Media,” with options for importing individual files or an entire media folder. You can also click the import area in the media panel to open the file browser. Dragging files directly from Finder into the media library works just as well.
Ordering the First Clips
Drag your main clips onto the “Timeline” in rough story order before making detailed edits. Keep the primary footage on one video track so there is room for titles, overlays, and other elements above it. For demanding footage such as 4K video, using proxy files can make editing smoother on less powerful Macs.
Step 4. Trim, Split, and Reorder the Video
Your clips are now arranged, so begin trimming unwanted parts from videos. A MacBook movie editor helps remove unnecessary footage and shorten clips. Learn basic trimming, splitting, and reordering actions using simple Mac keyboard shortcuts:
| What You Want to Do | How to Do It on a Mac |
| Shorten a Clip | Hover over the clip edge until the trim tool appears, then drag inward |
| Cut at an Exact Moment | Park the playhead where you want the cut and press “Command +B” |
| Remove a Middle Section | Split twice, select the piece between the cuts, then delete it |
| Close the Gap Left Behind | Control-click the gap and choose “Ripple Delete” or “Close Gap” |
| Jump to the Next Edit Point | Press the up or down arrow to move between cuts |
| Nudge One Frame | Hold “Option” and press the “Left” or “Right” arrow to nudge selected clips by one frame |
If no track is selected, splitting may cut every clip under the playhead. Select the clip first, then split only the section you actually want.
Step 5. Add Text, Music, and Supporting Visuals
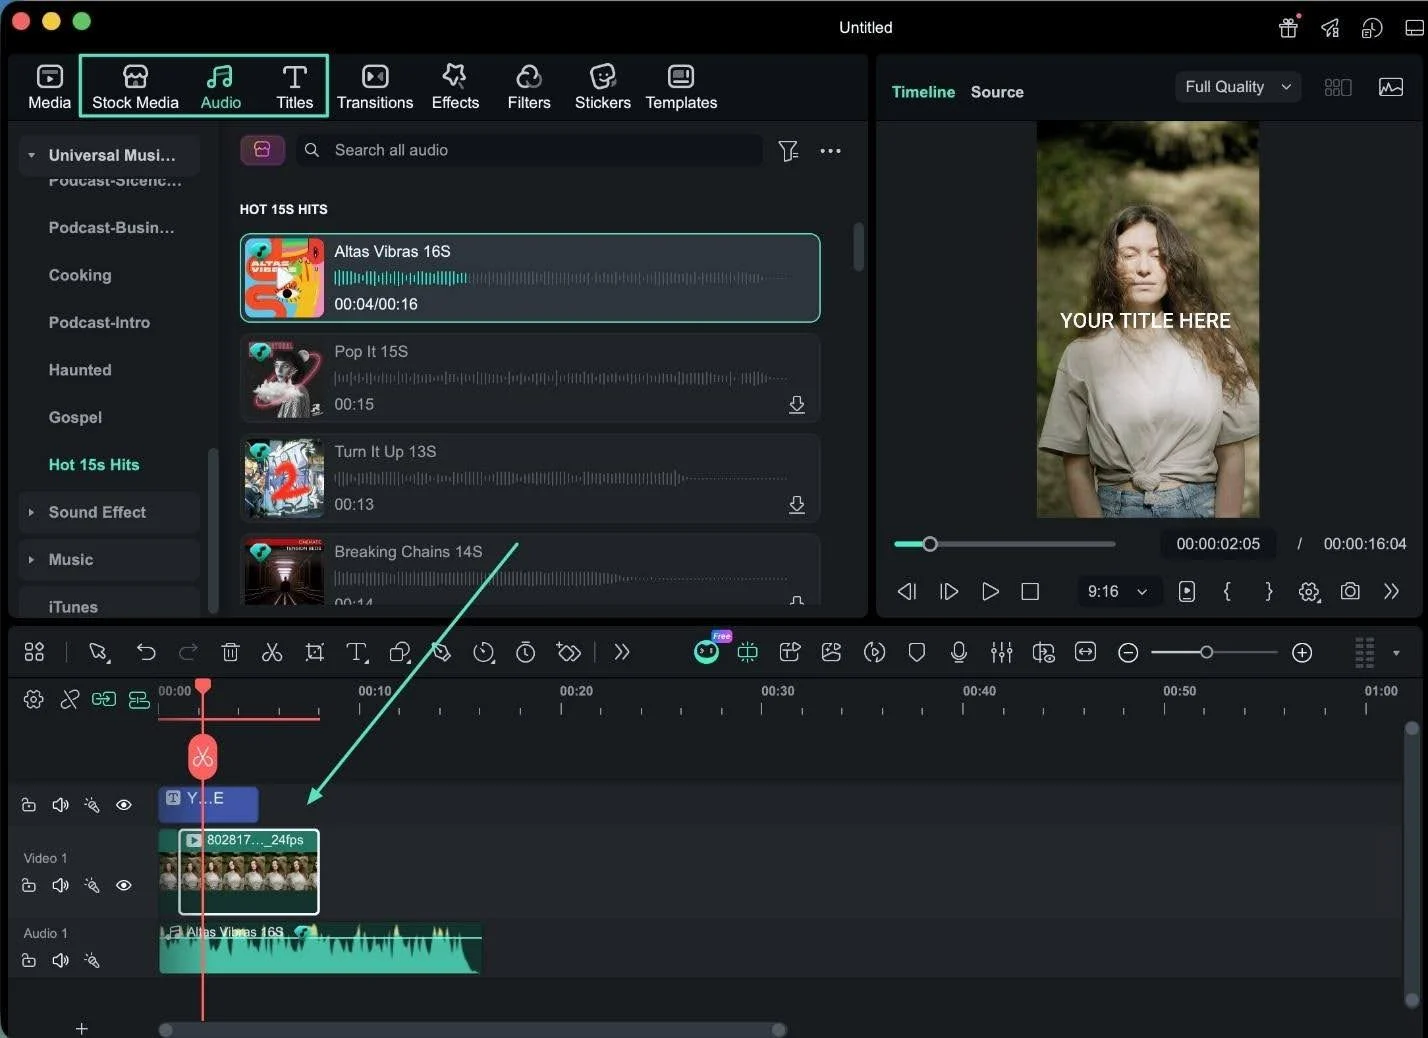
After trimming, a video editor Mac project is ready for useful supporting elements. Add text, music, and visuals carefully to improve the story without creating distractions.
| Earns Its Place | Works Against the Video |
| An opening title that names the video in a few words | A long animated intro before anything happens |
| Labels that stay up long enough to read twice | Text that leaves before a viewer finishes reading |
| Music sitting clearly under the voice | Music competing with the voice for attention |
| B-roll showing the thing being discussed | Stock footage dropped in to fill time |
Give titles, music, and B-roll their own tracks rather than stacking them onto the footage. It costs nothing, and it means moving one element later leaves the others alone. That habit is what makes Filmora workable as a MacBook movie editor on longer projects.
Step 6. Review and Export the Finished Video
Review the complete video carefully before exporting to catch any remaining editing problems. Use the table below to check picture, sound, text timing, and framing:
| What to Check | How to Check It | The Fault It Catches |
| Picture | Play it through without touching anything | Black frames left between clips |
| Sound | Listen on headphones and on laptop speakers | Music burying the voice |
| Text Timing | Read each title out loud as it plays | Labels that vanish too early |
| Framing | Watch the edges of the frame | Heads cropped after a ratio change |
| Both Ends | Check the first and last second | A stray frame or an abrupt finish |
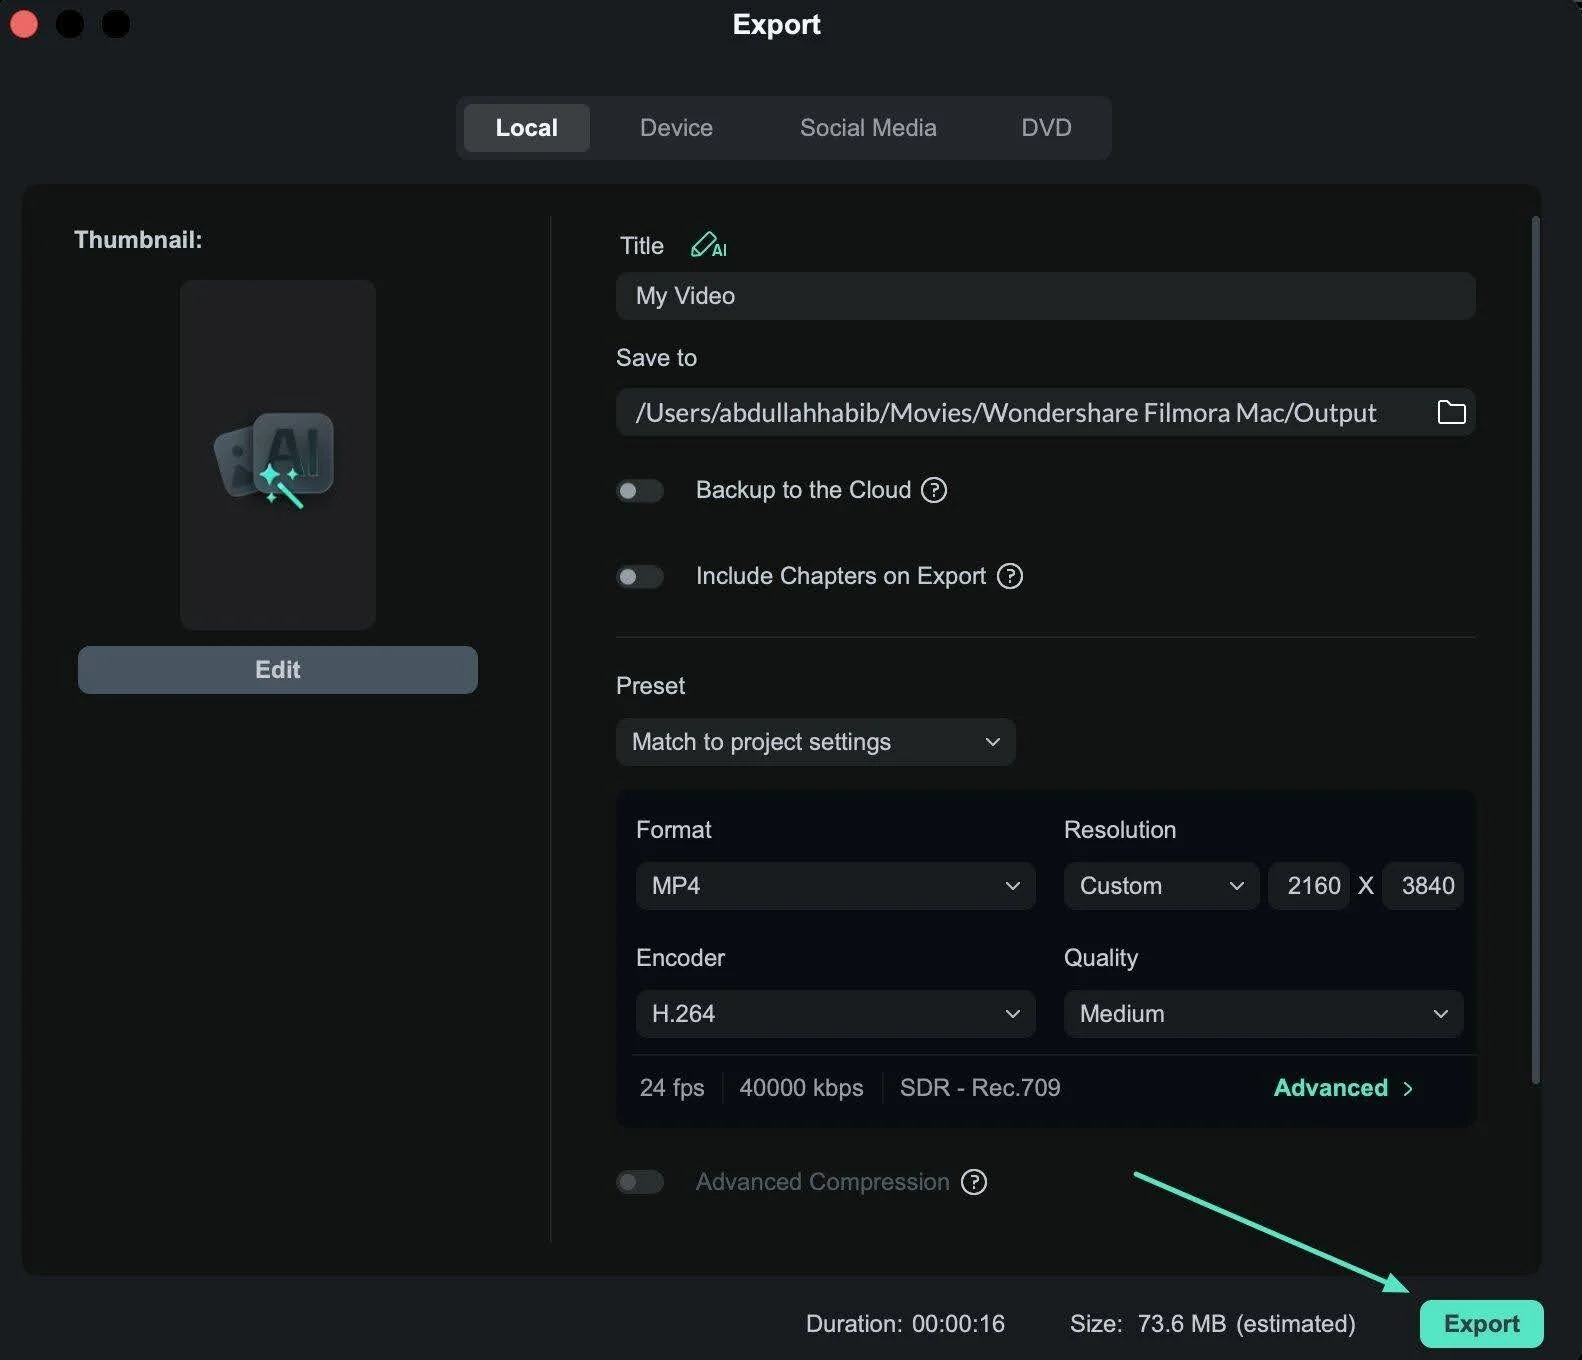
Click “Export” in the top-right corner and open the “Local” tab. Choose the format, enter a file name, and select the “Save to” folder. Select MP4 for online use or Apple ProRes when moving the video to another editor. Press “Export” again to save the video. The Filmora timeline guide provides more details about arranging and managing clips during editing.
Conclusion
Using a video editor on Mac starts with clear sequencing and balanced sound choices. Filmora helps you trim unwanted footage, arrange scenes, and manage audio with ease. Keep voices above background music and review the complete video before final export. Add effects after the main edit is complete and every important element feels complete.