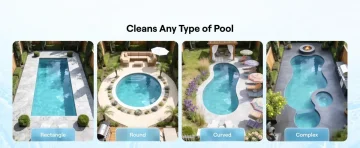
How to create a limited drawing area on a background image? SpaceRunners has developed a design tool using Fabric.js that allows artists to create designs within a predefined area on physical objects like T-shirts.

SpaceRunners has developed Fabric.js, a design tool that allows artists to create custom designs on a predefined area of a physical object, such as a T-shirt. This tool ensures that designs stay within a specific boundary, preventing elements outside the designated area from being printed.
To achieve this functionality, SpaceRunners, co-founded by Deniz Ozgur, uses Fabric.js, a JavaScript HTML canvas library that simplifies working with the HTML5 canvas element. However, there is no direct API in Fabric.js for limiting a drawing area while ensuring elements like resize and rotate controls remain visible outside the boundary.
This article explains how this feature was implemented in Fabric.js, including key UI considerations, the step-by-step approach, and the complete code.
Why Fabric.js?
Fabric.js is a JavaScript library for working with the HTML5 canvas element. It simplifies the process of creating, manipulating, and rendering objects on a canvas. Some of its key advantages include:
- Object-based design: Every element on the canvas is treated as an object that can be easily modified.
- Scalability & performance: It provides smooth interactions even with complex designs.
- Rich feature set: Includes image manipulation, clipping paths, text styling, and transformation controls.
By leveraging Fabric.js, SpaceRunners, created a design tool that integrates predefined drawing areas, zooming capabilities, and object constraints while ensuring a smooth user experience.
UI considerations for a seamless user experience
The design tool has a full-width canvas inside the editor, as shown in the UI image. The canvas spans the entire area to accommodate essential user interactions:
- Objects should be clipped inside the drawing area – Any part of an object outside the designated boundary should not be drawn.
- Resize and rotate controls should remain visible – Even if a design element goes outside the boundary, users should still be able to manipulate it.
- Zooming should apply to both the background image and design elements – The entire canvas (including the background image) should scale when zooming in or out.
One simple approach would be to position the drawing area as an HTML element on top of a background image. However, this would not allow controls to be visible outside the drawing area, and the background would not scale correctly.
Instead, a Fabric.js-based approach is used to maintain full control over object placement, clipping, and zooming.
The Fabric.js approach: Structuring the solution

To limit the drawing area while preserving user experience, the solution uses three key Fabric.js techniques:
Setting a background image with setBackgroundImage
- The background image (e.g., a T-shirt or a shoe) is part of the canvas itself, rather than a separate HTML element.
- This allows it to scale and zoom together with the design elements.
Applying a clip path to restrict the drawing area
- A Fabric.js clip path defines the allowed design space, ensuring objects outside this area are clipped.
- The clip path is dynamically positioned based on the container size for responsiveness.
Using an overlay image to prevent background clipping
- Since the clip path would also affect the background image, an inverted clip path overlay is added.
- This ensures the background remains fully visible while still restricting the design area.
By combining these three techniques, the design tool accurately limits the drawing space while keeping controls and zoom functionality intact.
Implementing the solution: Step-by-step code breakdown
Here’s how the Fabric.js function is structured to set up the background image, clip path, and overlay image:
Step 1: Define the function and retrieve canvas properties
export const setBackgroundImage = (canvas, img, isMobile) => {
// Retrieve the clipPath object and canvas dimensions
const { clipPath, width, height, wrapperEl } = canvas;
// Calculate the background image width to fit the container
const { clientHeight, clientWidth } = wrapperEl;
const aspectRatio = clientWidth / clientHeight;
What this does:
- Retrieves the clip path and canvas dimensions.
- Calculates the correct width of the background image to fit the editor space.
Step 2: Scale and position the background image
const imageWidth =
(canvas.width *
(isMobile
? GARMENT_IMAGE_MOBILE_WIDTH
: clientHeight * PERCENTAGE_OF_CONTAINER_HEIGHT * aspectRatio)) /
clientWidth;
img.scaleToWidth(imageWidth);
img.set({
left: width / 2,
top: height / 2,
originX: ‘center’,
originY: ‘center’,
selectable: false,
centeredScaling: true,
erasable: false,
excludeFromExport: true,
});
canvas.renderAll();
What this does:
- Adjusts the image size based on the container’s aspect ratio.
- Centers the background image within the canvas.
- Disables selection and editing of the background image.
Step 3: Apply the clip path to limit the drawing area
const oldClipPath = { …clipPath };
canvas.clipPath.top = clipPath.templateBasedTop;
// Adjust clip path position for responsive scaling
scaleObjectTops(canvas, oldClipPath);
// Set the background image and re-render the canvas
canvas.setBackgroundImage(img).renderAll();
What this does:
- Ensures the clip path is positioned correctly for different screen sizes.
- Applies the clip path to restrict the drawing area.
Step 4: Add an overlay image with an inverted clip path
img.clone((copy) => {
const clipPath2 = new fabric.Rect({
height: clipPath.height – 2,
width: clipPath.width – 2,
left: clipPath.left + 1,
top: clipPath.top + 1,
selectable: false,
stroke: ‘transparent’,
strokeWidth: 0,
inverted: true,
absolutePositioned: true,
excludeFromExport: true,
});
copy.set({ clipPath: clipPath2 });
// Set overlay image to prevent background clipping
canvas.setOverlayImage(copy).renderAll();
});
};
What this does:
- Clones the background image and applies an inverted clip path.
- Prevents the original clip path from affecting the background.
- Ensures only design elements are clipped, not the background image.
Code Breakdown
- Set the background image: The function first calculates the correct width of the background image to fit inside the container. It then positions the image at the centre of the canvas.
- Apply a clipping path: The clipPath is used to restrict drawing to a specific area, ensuring that designs do not exceed the predefined boundary.
- Add an overlay image: Since the clipping path would also affect the background image, a duplicate background image is created and positioned as an overlay. This overlay image has an inverted clipPath, meaning only the background remains unaffected while the drawing area is still clipped.
The Final Outcome
The implementation ensures:
- The background image is part of the canvas and scales correctly.
- The drawing area is strictly defined, preventing unwanted designs outside the boundary.
- Resize and rotate controls remain visible even when an object extends beyond the drawing area.
- Zooming applies to both the background image and drawing area, maintaining a smooth user experience.
The SpaceRunners admin panel allows positioning of the design area within the template. When users draw outside this area, those parts are automatically clipped while maintaining the ability to resize or rotate objects.